Integrating Google Workspace as an External Identity Provider for AWS IAM Identity Center
Table of Contents
- Overview of Centralized Identity Store Integration
- Step-by-Step
- Next step
Overview of Centralized Identity Store Integration
The Importance of Centralized Identity Management
In today’s distributed environments, managing identities across platforms is complex and risky. A centralized identity store simplifies user access, reduces administrative burden, and enhances security. It serves as a single source of truth, ensuring that user roles and access are managed from one system. When employees leave, centralized identity management ensures that access is revoked across all systems, minimizing the risk of data breaches or unauthorized access.
Use Case: Mitigating Offboarding Risks
Without a centralized system, offboarding employees becomes a security liability as access may remain active across multiple platforms. By using a centralized identity store, access can be revoked instantly across all services, reducing the risk of security breaches.
AWS IAM Identity Center
AWS IAM Identity Center provides a default identity directory for managing AWS access, but many organizations use external providers like Google Workspace, Okta, or Microsoft Azure AD. IAM Identity Center supports these integrations, enabling organizations to centralize identity management while providing seamless Single Sign-On (SSO) for AWS resources. Through this integration, administrators can automate user provisioning using SCIM and manage access in one place, enhancing security and efficiency.
Step-by-Step
Tips: Having two windows side by side, windows #1 on Google Workspace, windows #2 on the AWS IAM Identity Center, will be helpful in this step-by-step guides.
This step-by-step guide augmented with screenshots and grouping by AWS Console and Google Admin for better clarity. The original documentation on AWS can be found here.

Step 1: Google Workspace: Configure the SAML application
-
Go to https://admin.google.com, and login using an account with super administrator privileges.
-
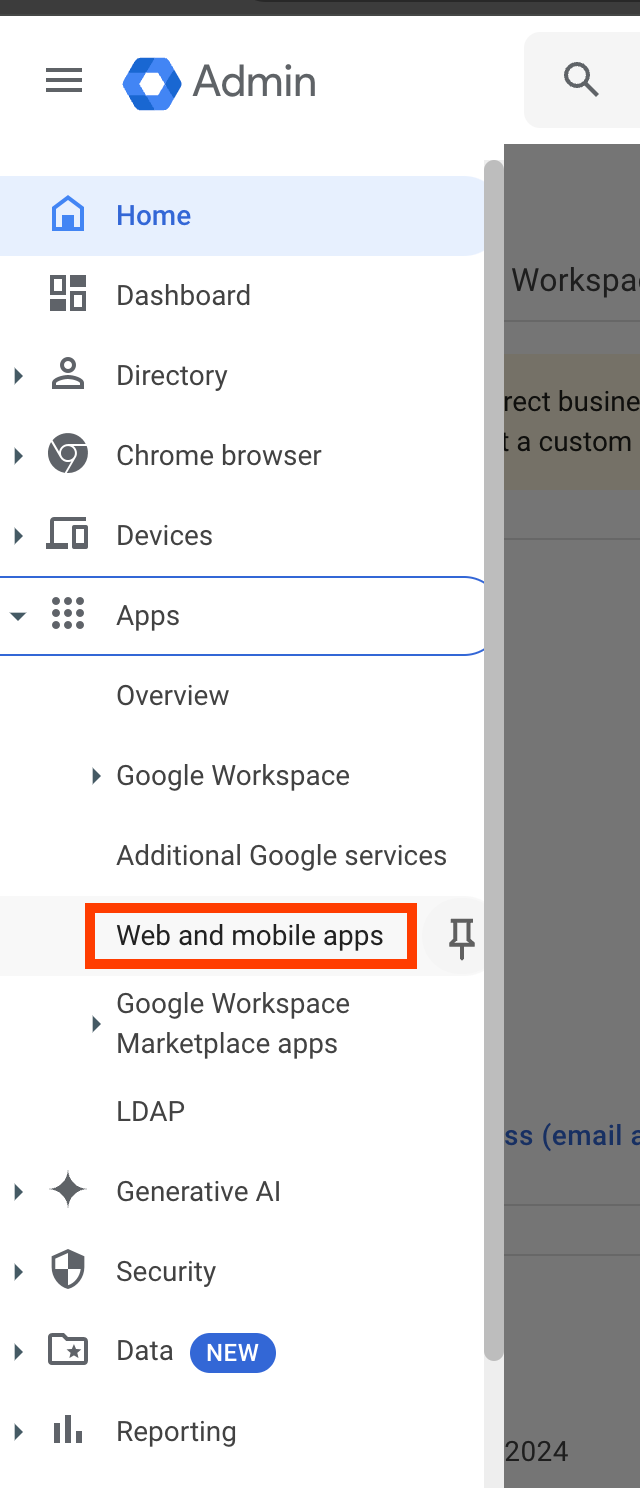
In the left navigation panel of your Google Admin console, choose Apps and then choose Web and Mobile Apps.
-
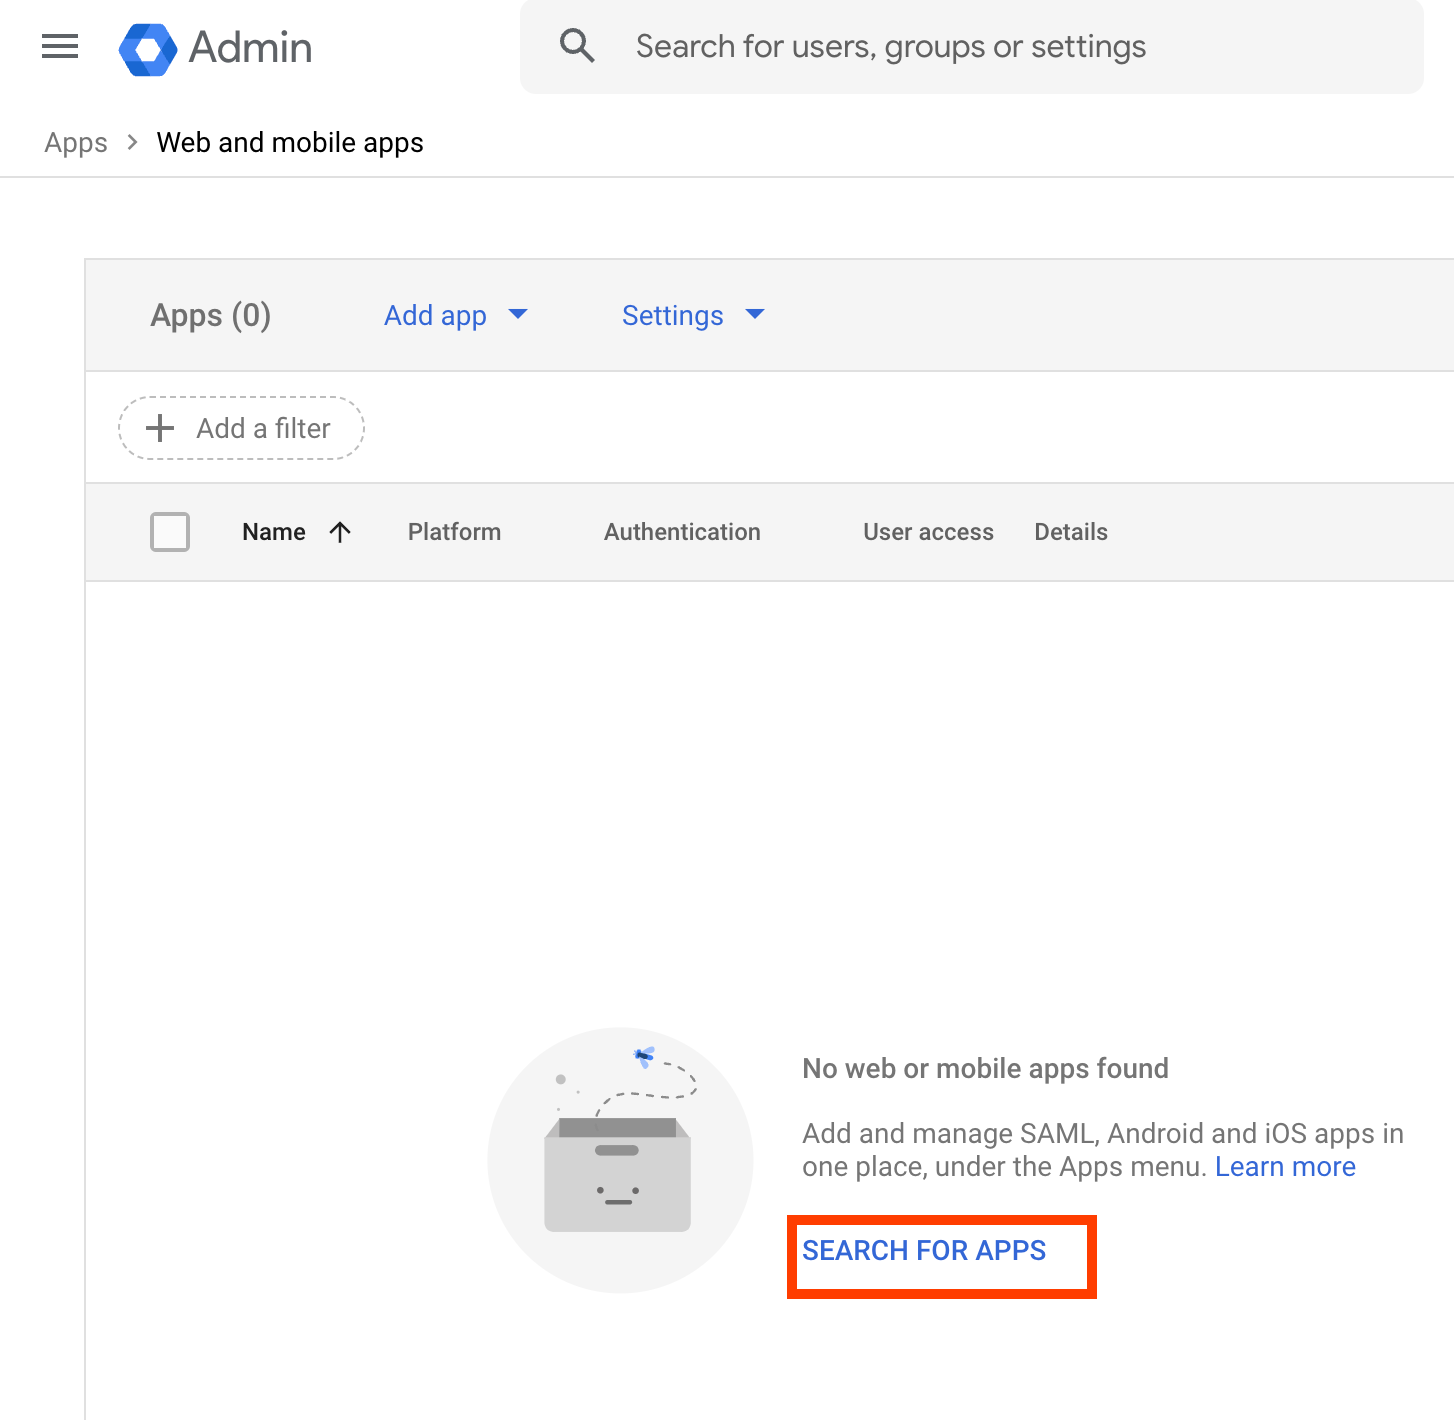
In the Add app dropdown list, select Search for apps.
-
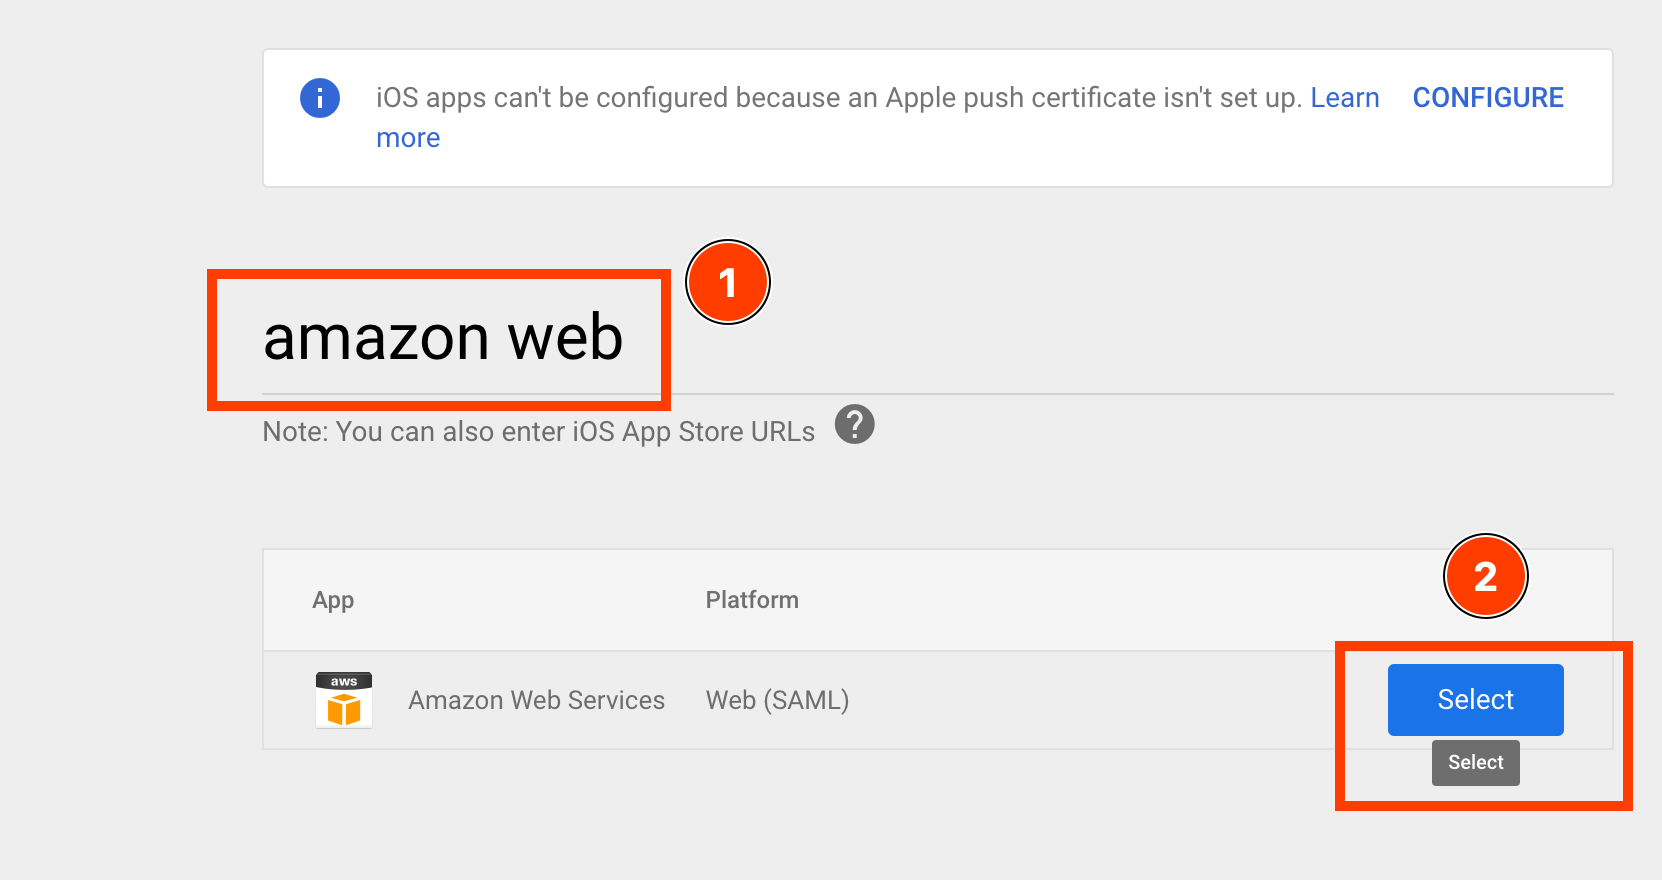
In the search box enter Amazon Web Services, then select Amazon Web Services (SAML) app from the list.
Keep this page of Google admin open, and open another windows for AWS IAM Identity Center. We will need to copy metadata and parameteres between the two providers.
Step 2: Change and setup Google Workspace as an SAML identity provider
-
Go to https://console.aws.amazon.com/singlesignon/home and sign in to the IAM Identity Center console using a role with administrative permissions.
-
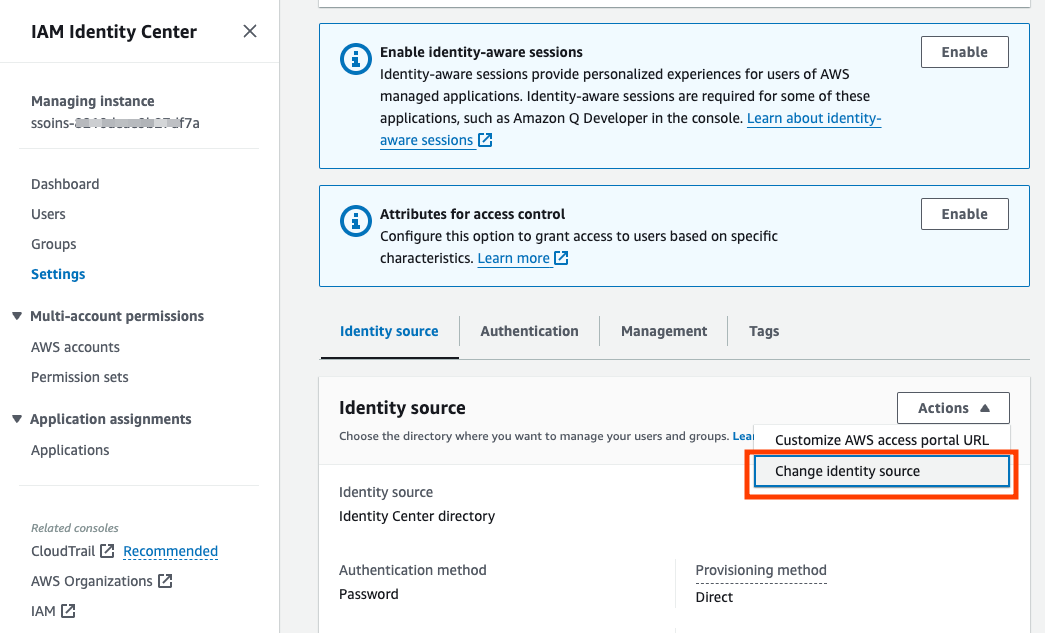
Choose Settings in the left navigation pane.
-
On the Settings page, choose Actions, and then choose Change identity source.
-
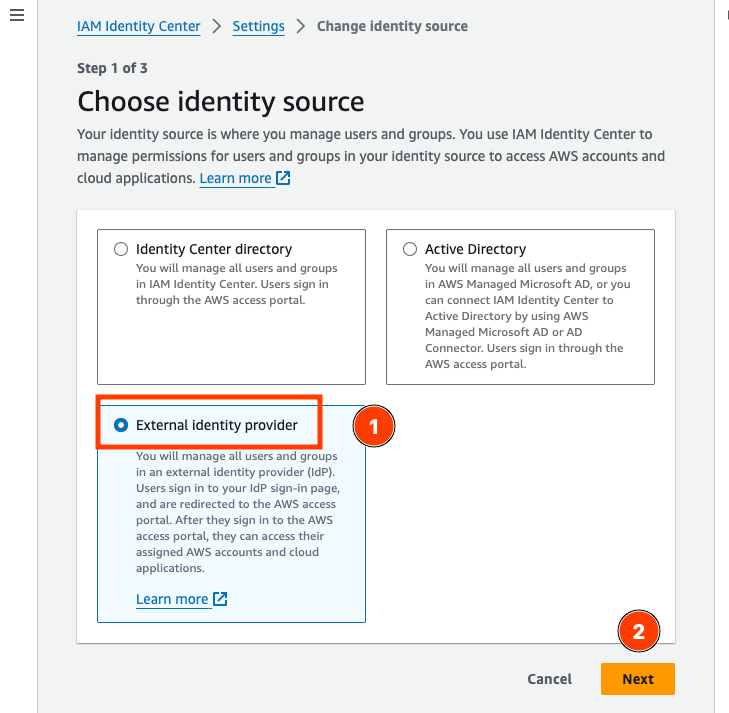
On the Choose identity source page, select External identity provider, and then choose Next.
AWS Console: Configure the IdP SAML in AWS IAM Identity Center
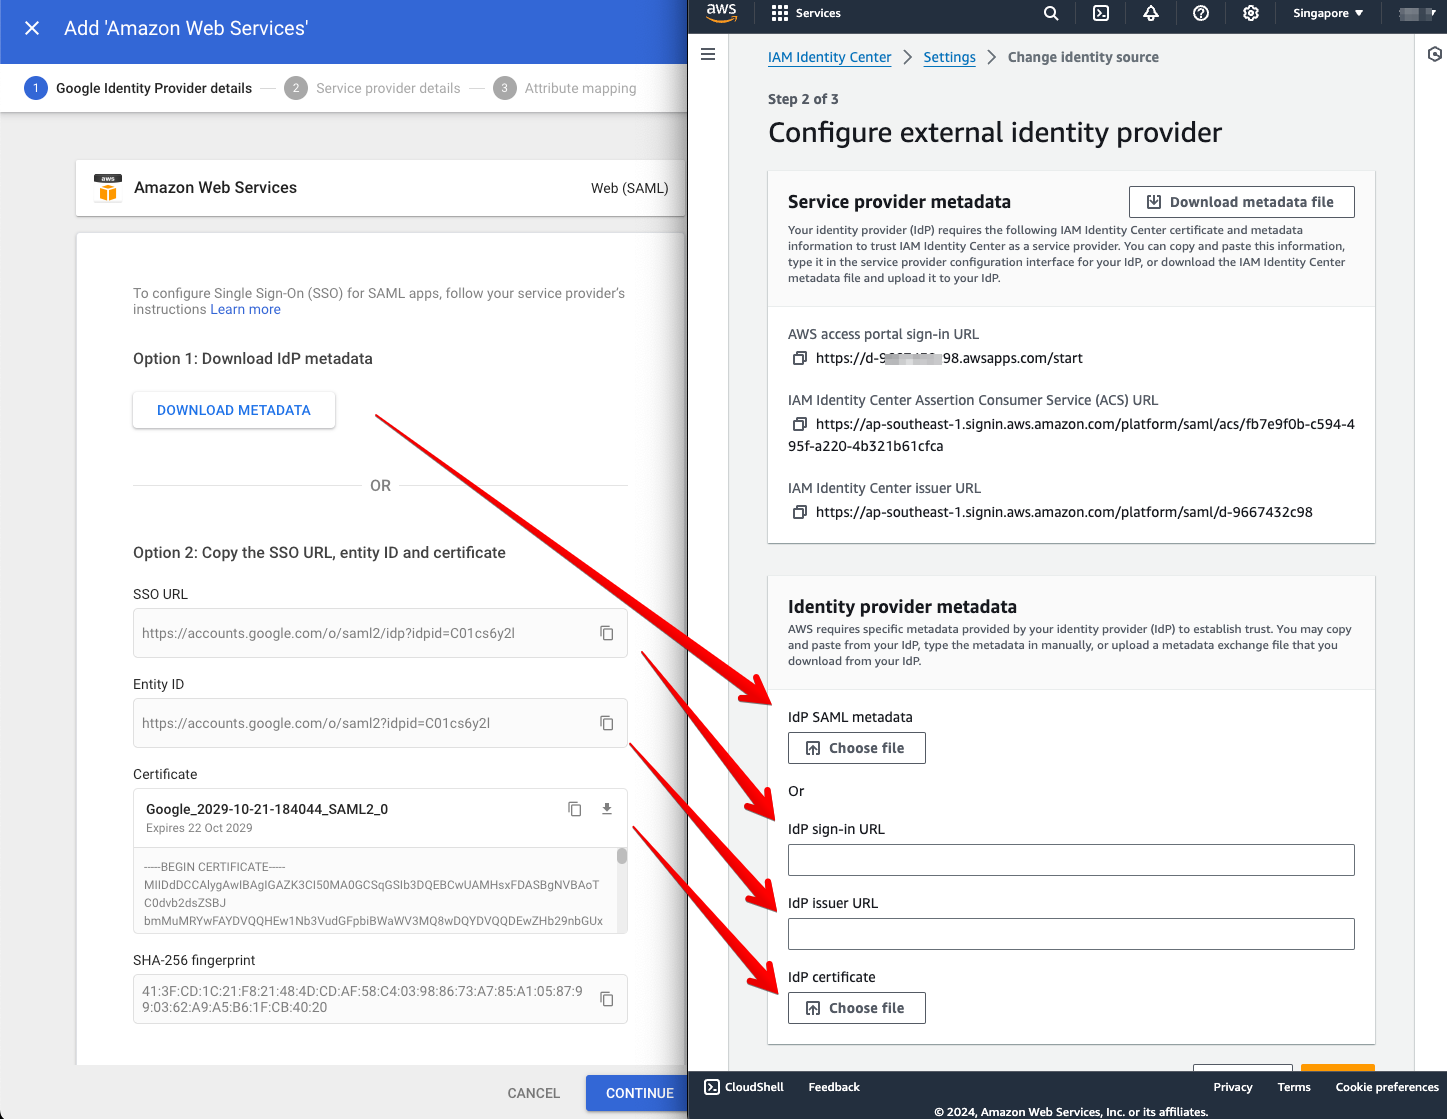
- We need to copy the following, from Google Admin to Amazon Web Services:
- On the Google Identity Provider details - Amazon Web Services page:
- Download IdP metadata.
- Copy the SSO URL, Entity ID URL, and Certificate information.
- On the AWS IAM Identity Center
- Upload the IdP metadata to IdP SAML metadata
- Paste the values to IdP sign-on URL, IdP issuer URL, and IdP certificate.
- On the Google Identity Provider details - Amazon Web Services page:
Google Admin page: Configure the Service Provider details
-
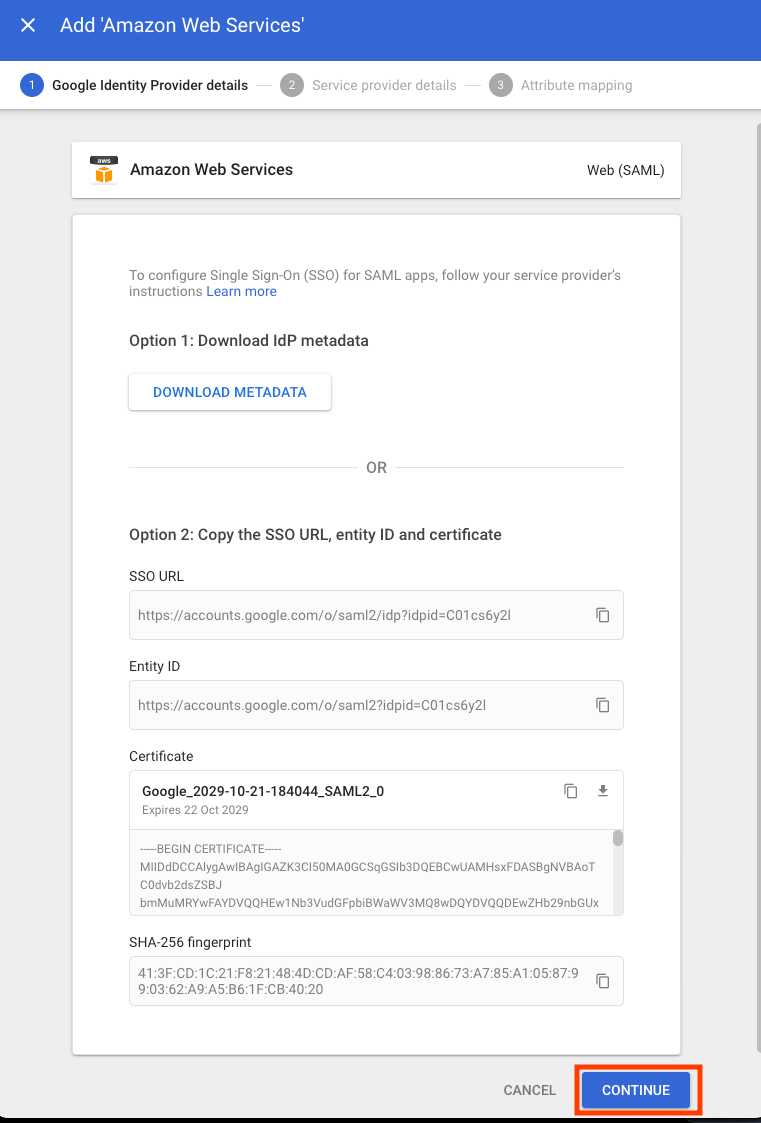
In the Google admin screen, select “CONTINUE” to move on to next step of configuration of Service Provider at the Google Admin
- Now we need to copy from AWS IAM Identity Center to Google Admin:
- On the Google Admin > Service Provider:
- Paste the values of “IAM ACS URL” from AWS Console, to “ACS URL” in the Google Admin page;
- Paste the values of “IAM Issuer URL” from AWS Console, to “Entity ID” in the Google Admin page
- For the Name ID in the Google Admin Service Provider details page:
- Select “EMAIL” for the fields under Name ID;
- For Name ID, select Basic Information > Primary email
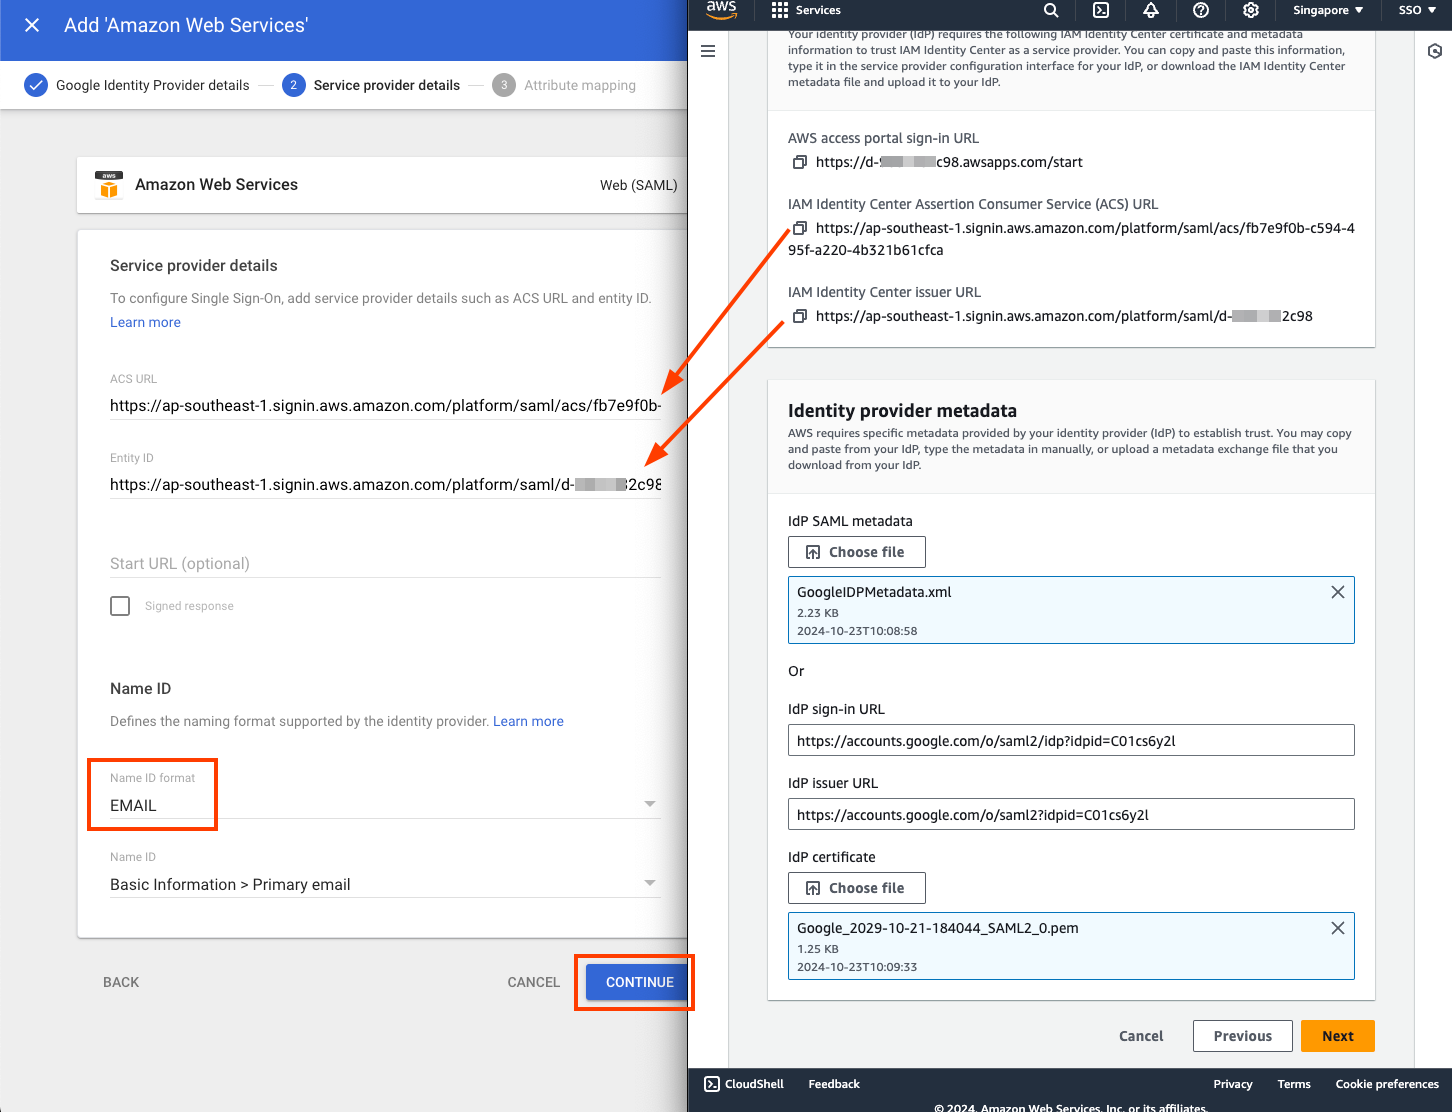
- On the Google Admin > Service Provider:
- Select “CONTINUE” at the bottom of the Google admin page.
Google Admin page: Configure the Attribute Mapping
-
On the Attribute Mapping page, under Attributes, choose ADD MAPPING, and then configure these fields under Google Directory attribute:
-
For the
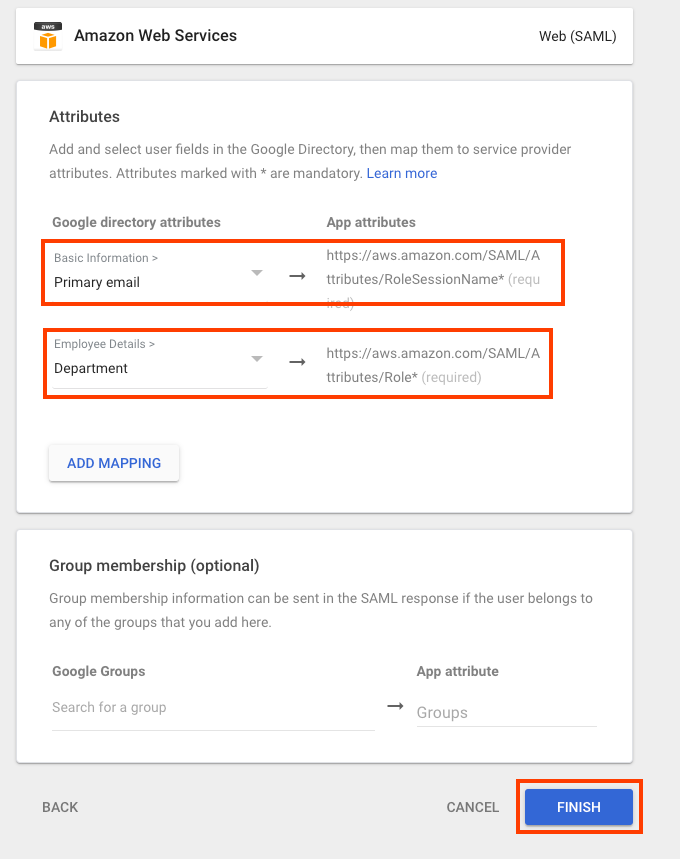
https://aws.amazon.com/SAML/Attributes/RoleSessionNameapp attribute, select the field Basic Information, Primary Email from the Google Directory attributes.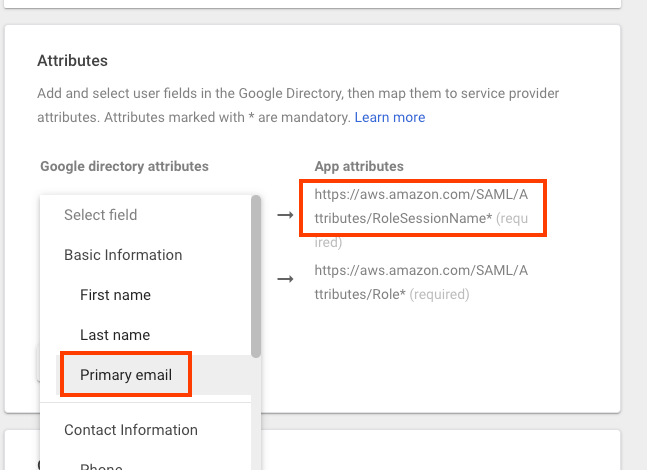
-
For the
https://aws.amazon.com/SAML/Attributes/Roleapp attribute, select any Google Directory attributes. A Google Directory attribute could be Department.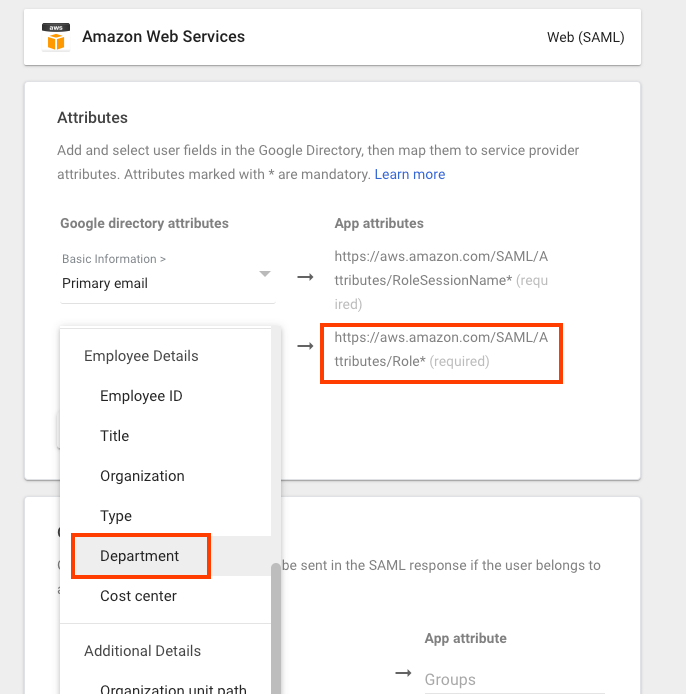
-
-
Choose FINISH.
-
Return to the IAM Identity Center console and choose Next. On the Review and Confirm page, review the information and then enter ACCEPT into the space provided. Choose Change identity source.
AWS Console: Review and confirm the use of external identity provider
- In the AWS IAM Identity Center console, select Next.
- On the Review and Confirm page, review the information and then enter ACCEPT into the space provided.
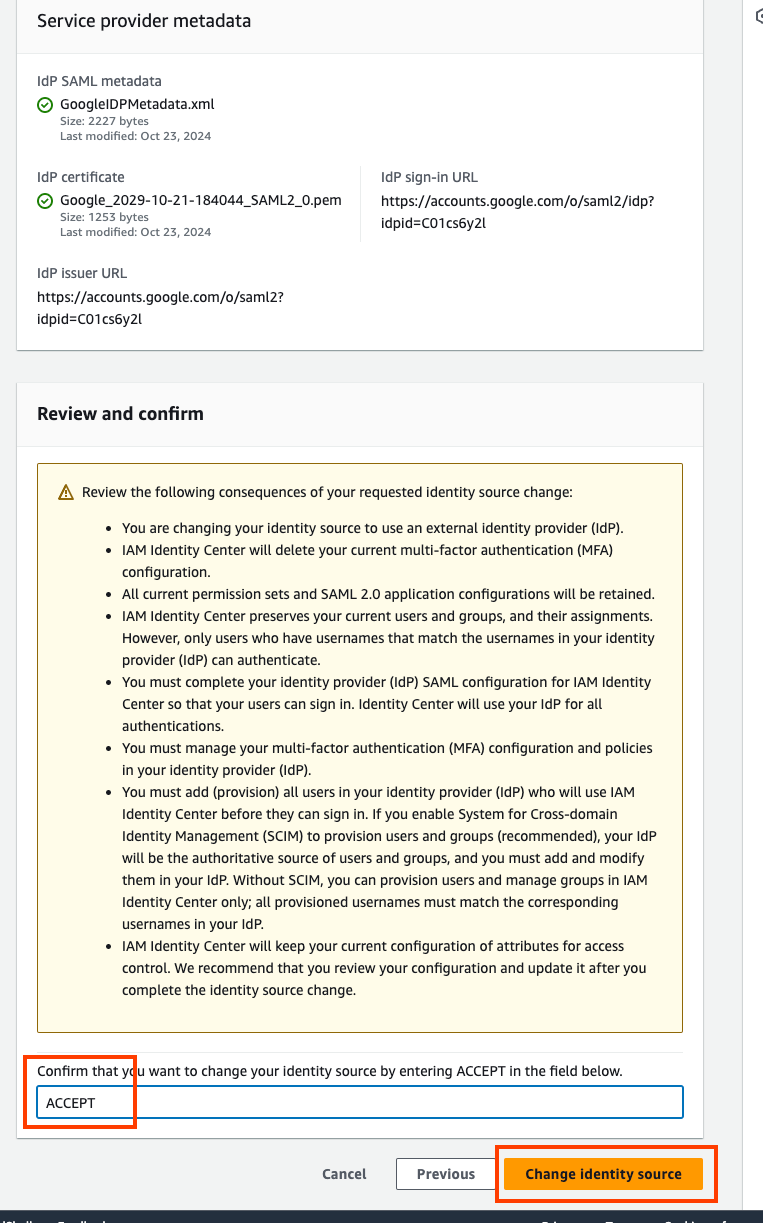
- Choose Change identity source.
Step 3: Google Admin: Enable the apps
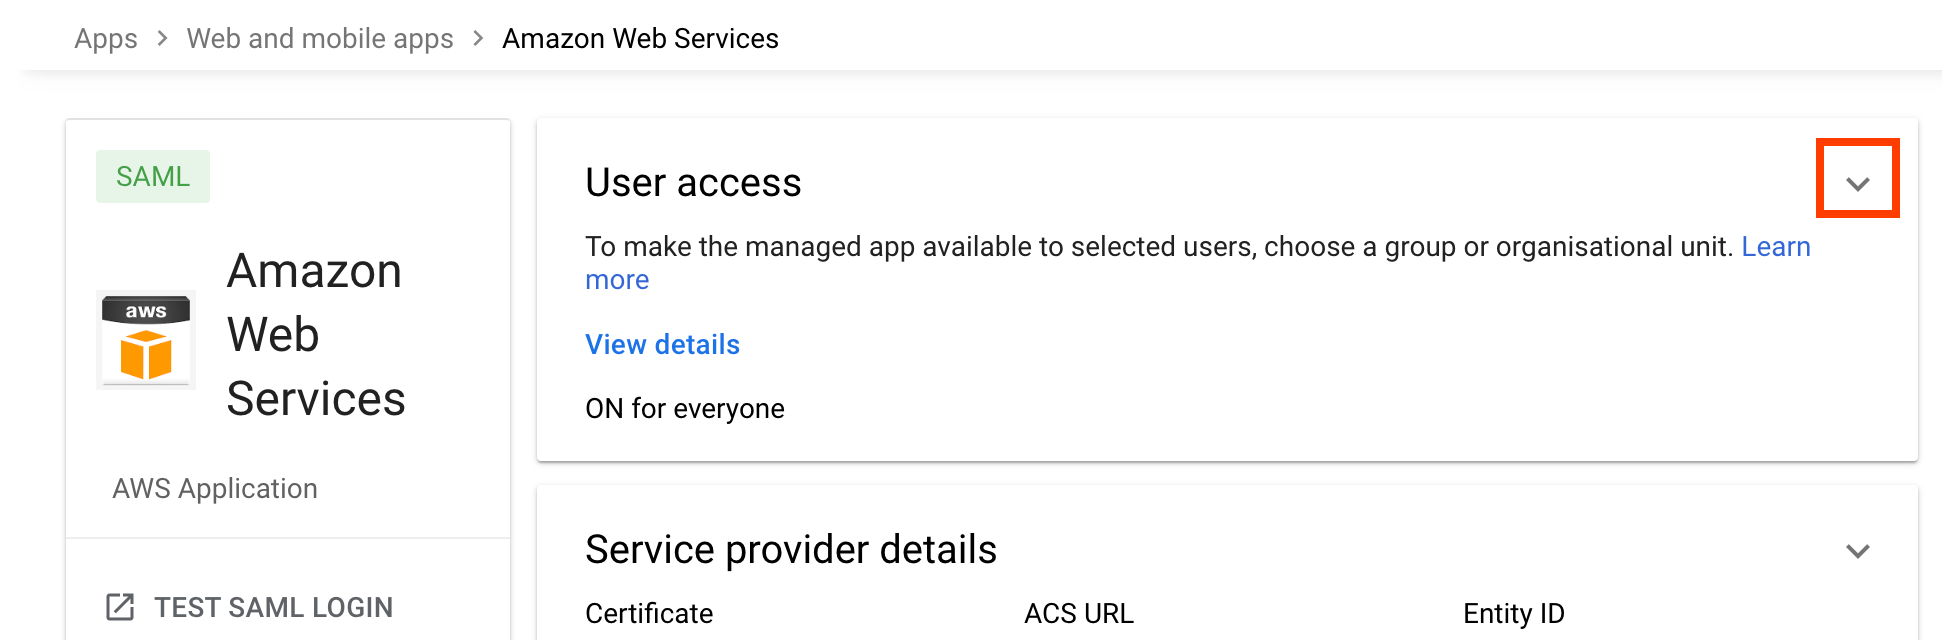
- In the Google Admin Console, select the newly created AWS IAM Identity Center application
- In the User access panel, choose the down arrow.
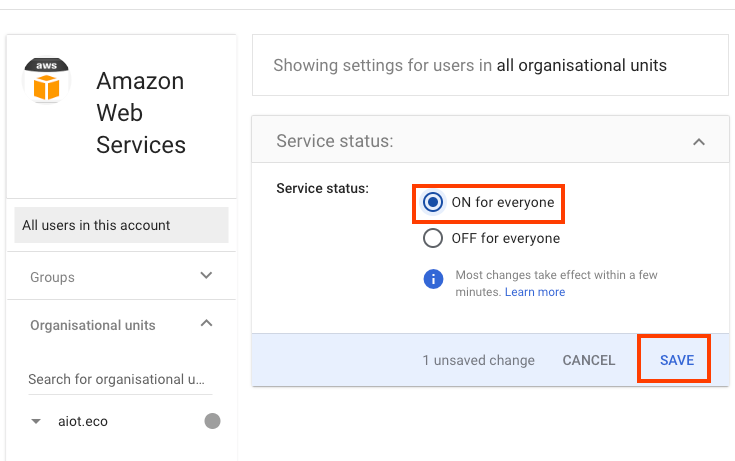
- In Service status panel, choose ON for everyone, and then choose SAVE.
Step 4: Set up IAM Identity Center automatic provisioning
- In the AWS IAM Identity Center console, choose Enable Automatic provisioning
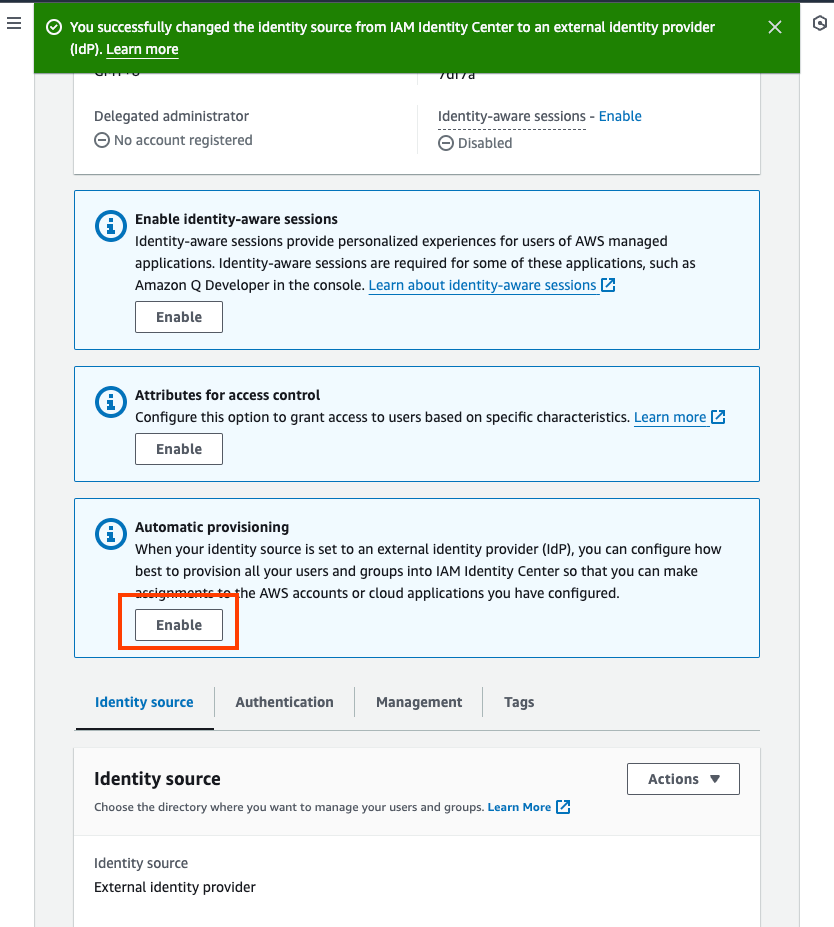
-
Keep the screen open
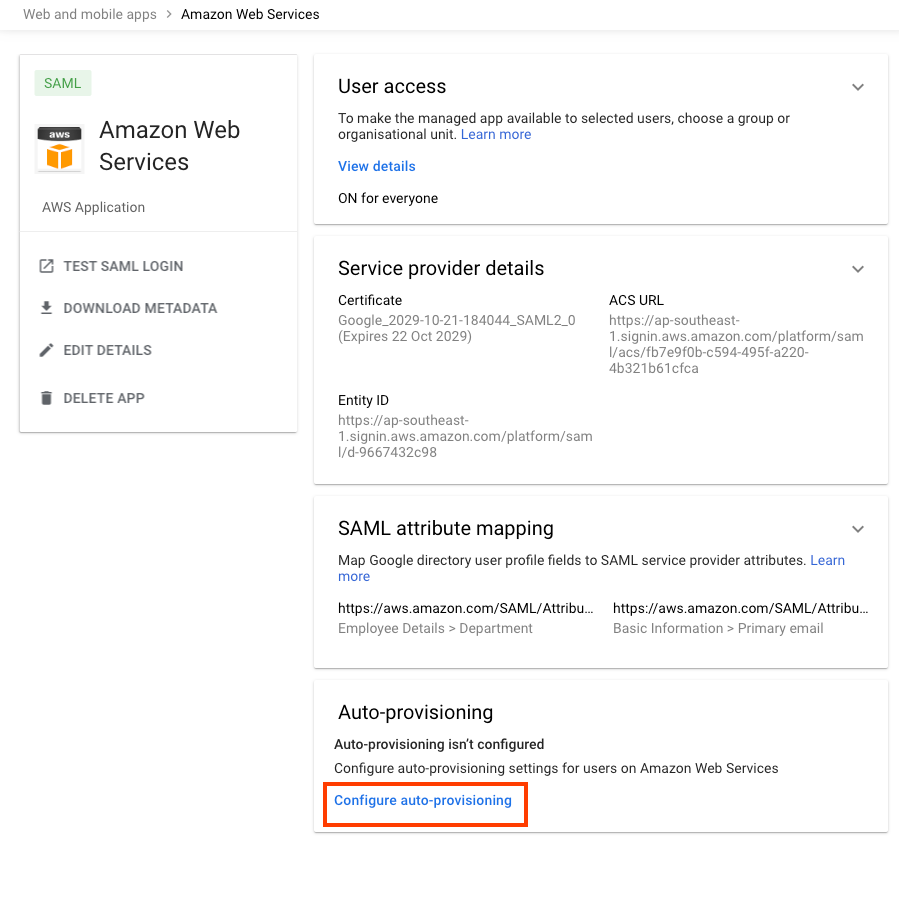
- In the Google Admin, select the newly created AWS IAM Identity Center application
-
In the Auto-Provisiong, choose “Configure auto-provisioning”
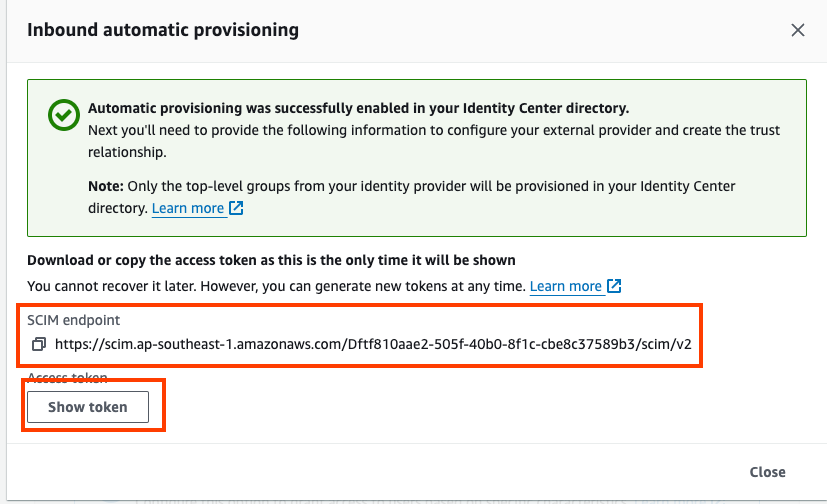
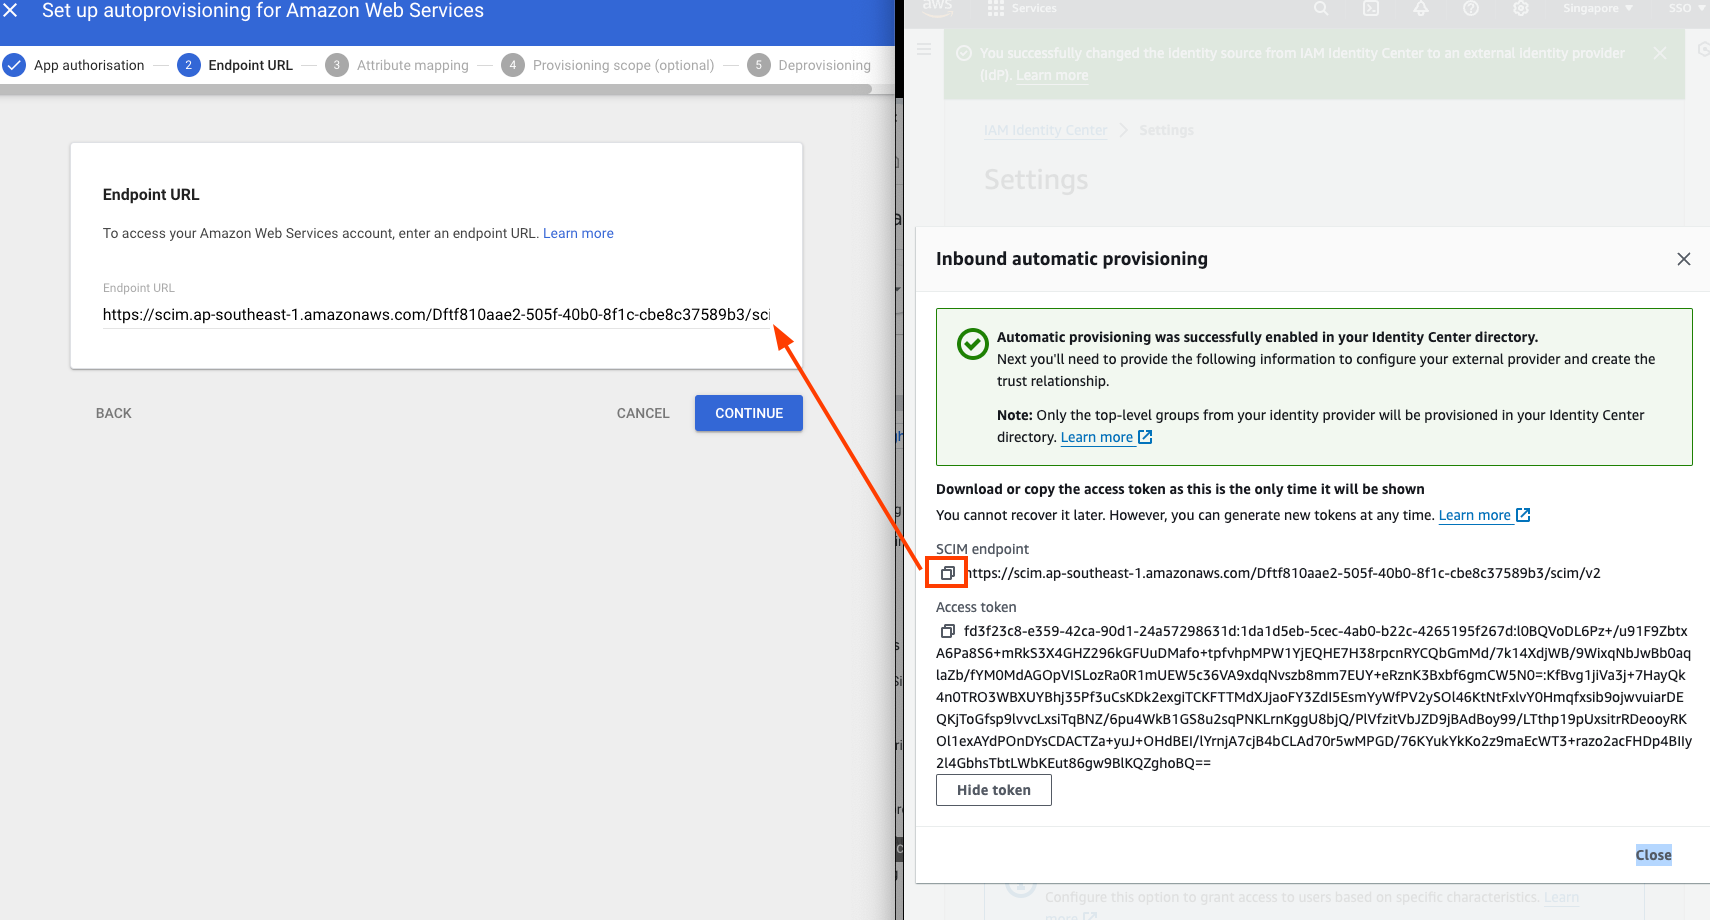
- With AWS IAM Identity Console and Google Admin windows side-by-side:
- Paste the value of “Access Token” in AWS IAM IDentity Console to “Access token” in Google Admin
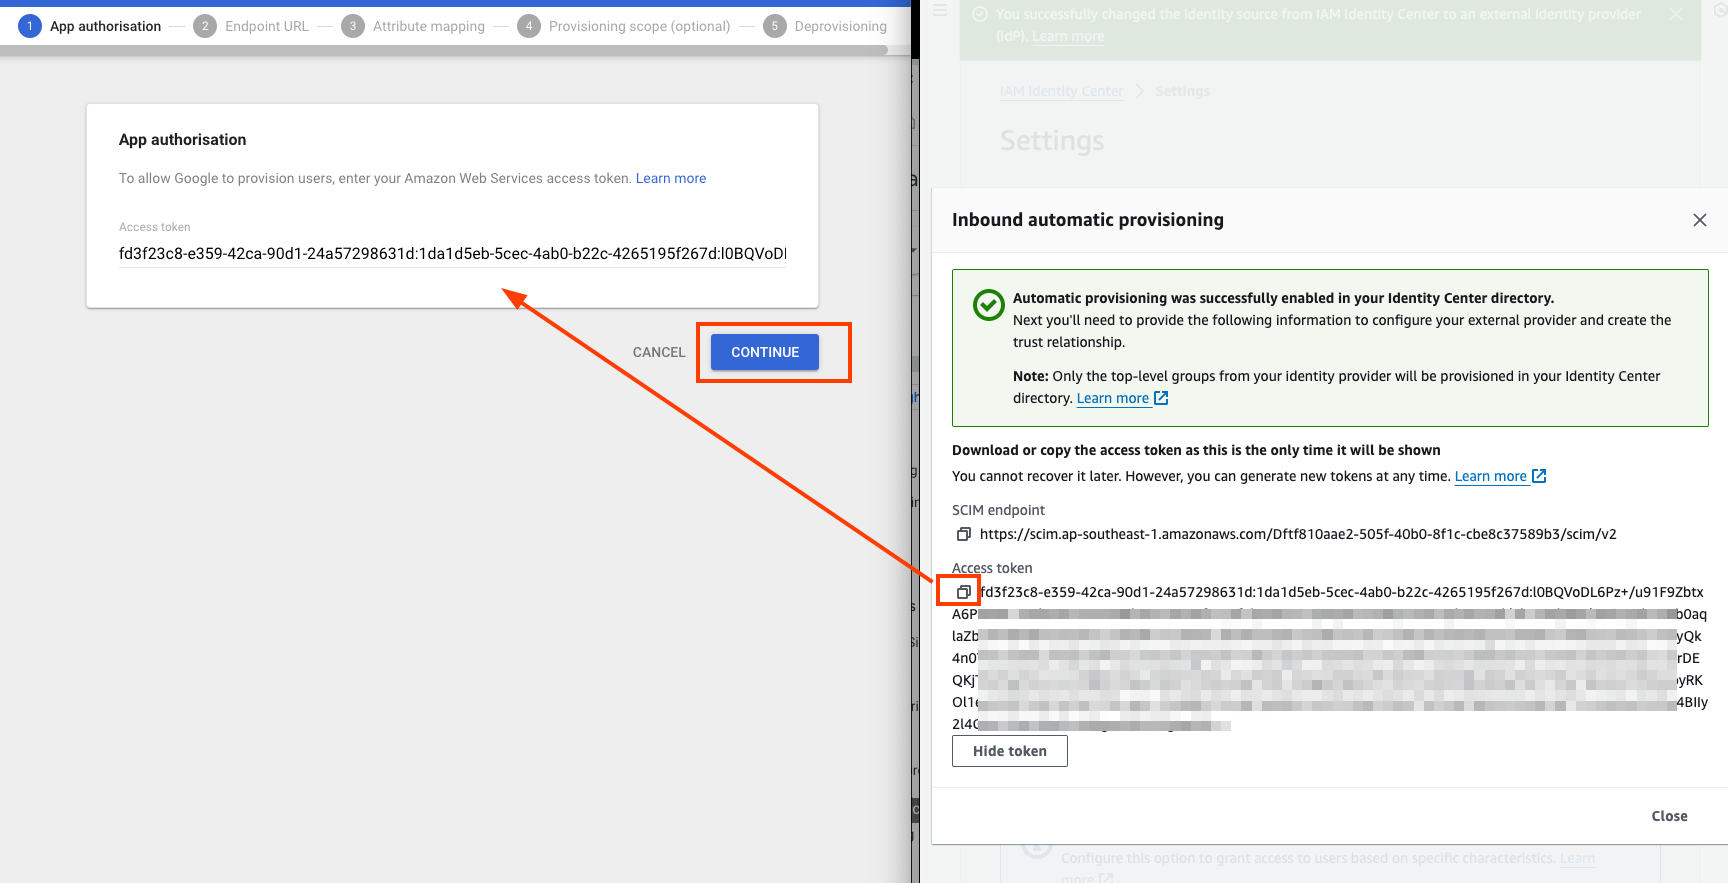
- Paste the value of “SCIM Endpoint” in AWS IAM IDentity Console to “Endpoint URL” in Google Admin
- Paste the value of “Access Token” in AWS IAM IDentity Console to “Access token” in Google Admin
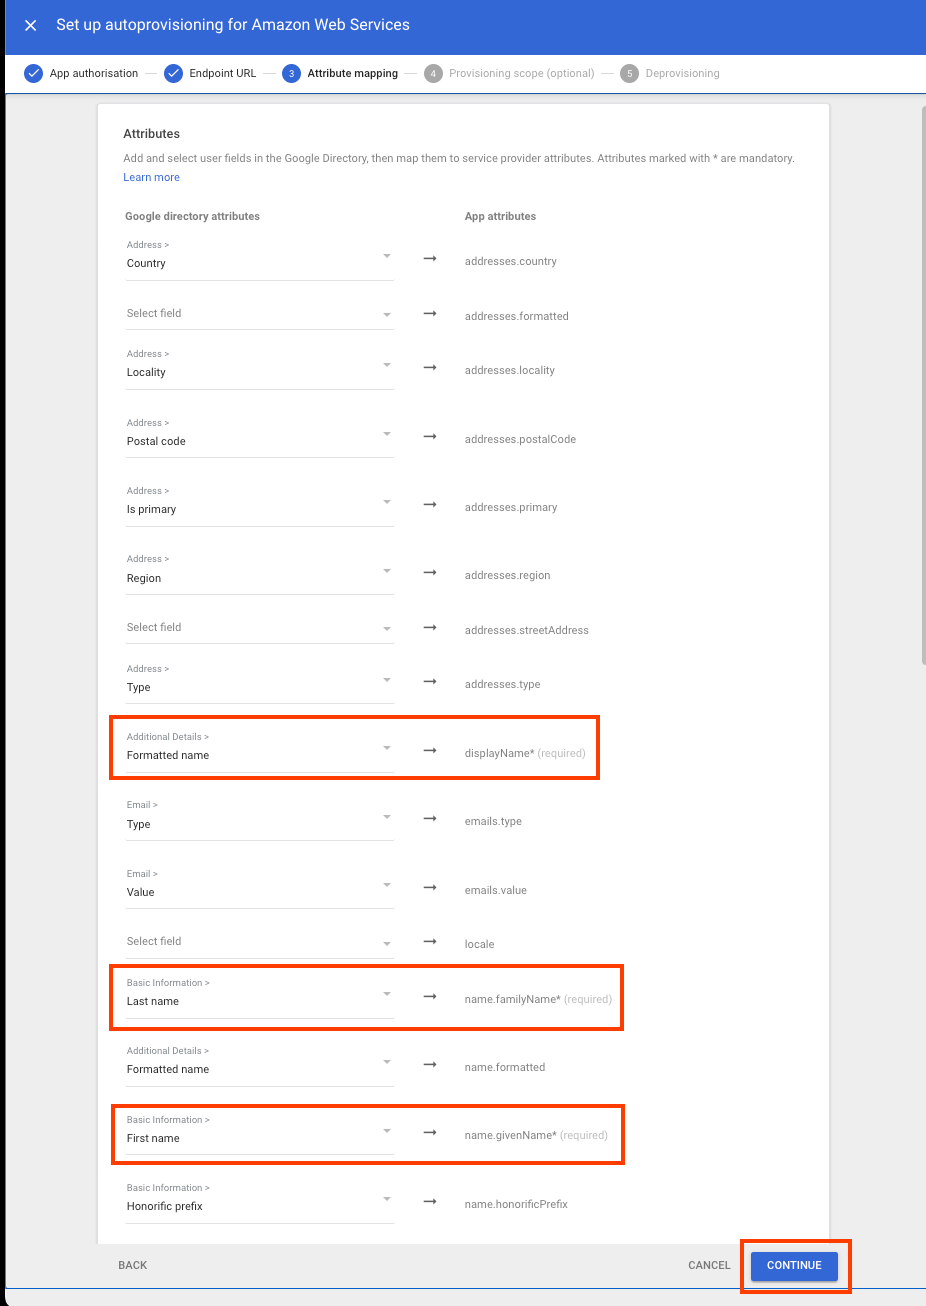
-
In the next screen of Google Admin, verify that all mandatory IAM Identity Center attributes (those marked with *) are mapped to Google Cloud Directory attributes. If not, choose the down arrow and map to the appropriate attribute. Choose Continue.
-
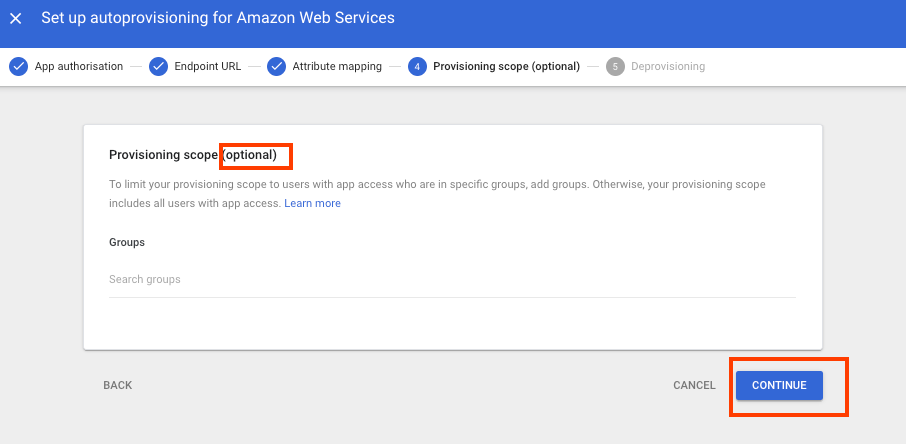
In Provisioning scope section, you can choose a group with your Google Workspace directory to provide access to the Amazon Web Services app. Skip this step and select Continue.
-
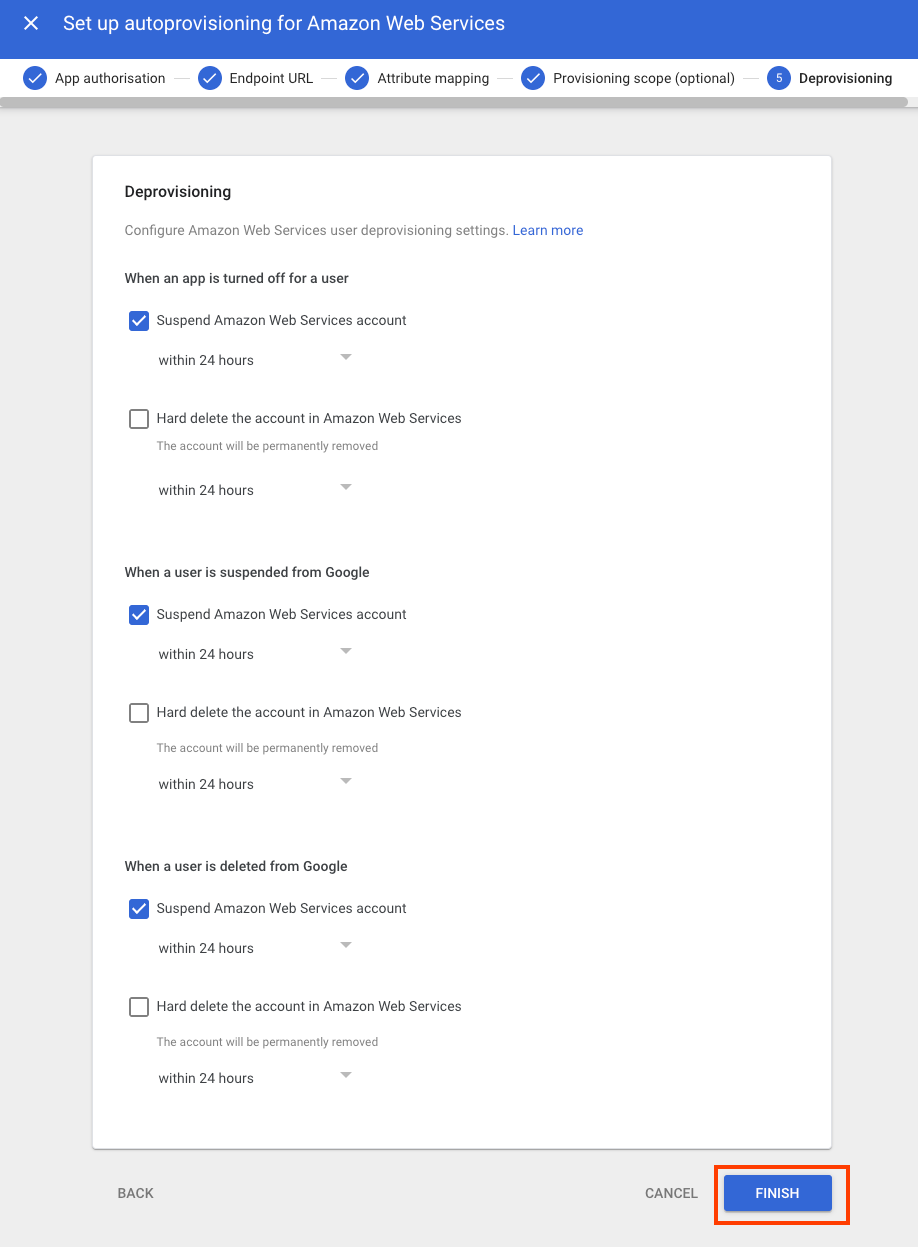
In Deprovisioning section, you can choose how to respond to different events that remove access from a user. For each situation you can specify the amount of time before deprovisioning begins to suspend and when to delete the account.
-
Choose Finish.
-
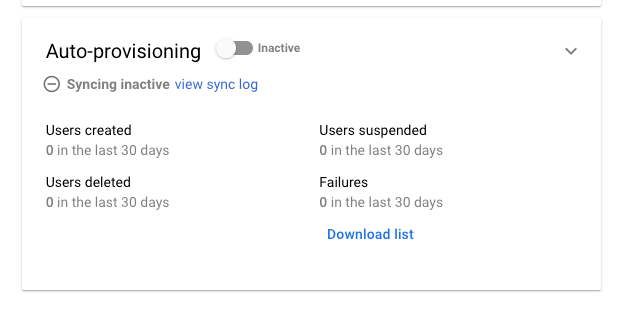
In the Auto-provisioning section, turn on the toggle switch
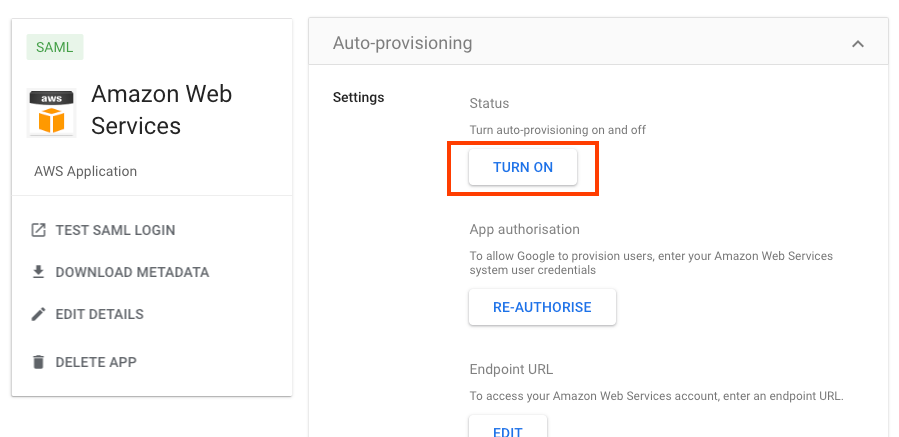
- Tottle the switch to change from Inactive to Active.
Next step
- Follow the steps in Assign users or user groups to the application to assign access to the users.